Display Maps in .NET 5 WPF Using VS Code
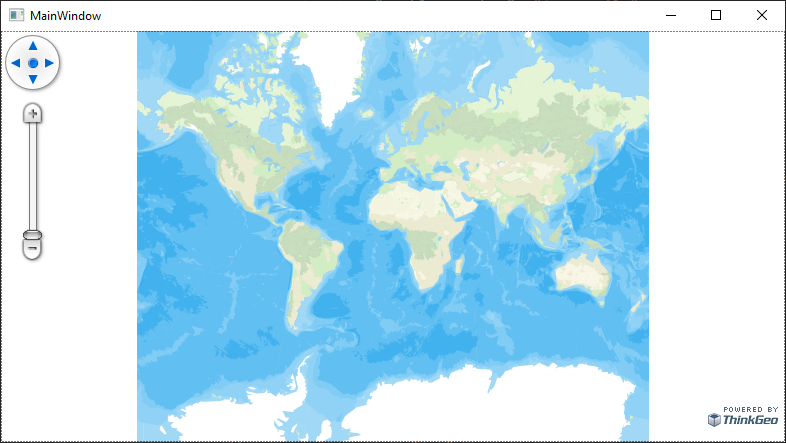
There are tons of map services we can use to set up a base map, however, only a few articles talk about how to do it for a Desktop project, and they are all over-complicated. In this article, I will cover how to simply create a desktop WPF application that shows a 3rd party background map using VS Code. By the end of this article, we will have a Windows desktop application like the following:
VS Code Setup
VS Code is a lightweight, open source development environment loved by millions of developers. I'm going to finish today's project using VS Code. This project will use .NET 5.0 on a Windows machine.
First, install .NET 5.0 SDK x64.
Second, let's make sure "C#" and "NuGet Package Manager" extensions have been installed in VS Code. Click the Extensions button on the left in VS Code, search the 2 extensions by name and install them. You will see them under INSTALLED group once finished.
Project Setup
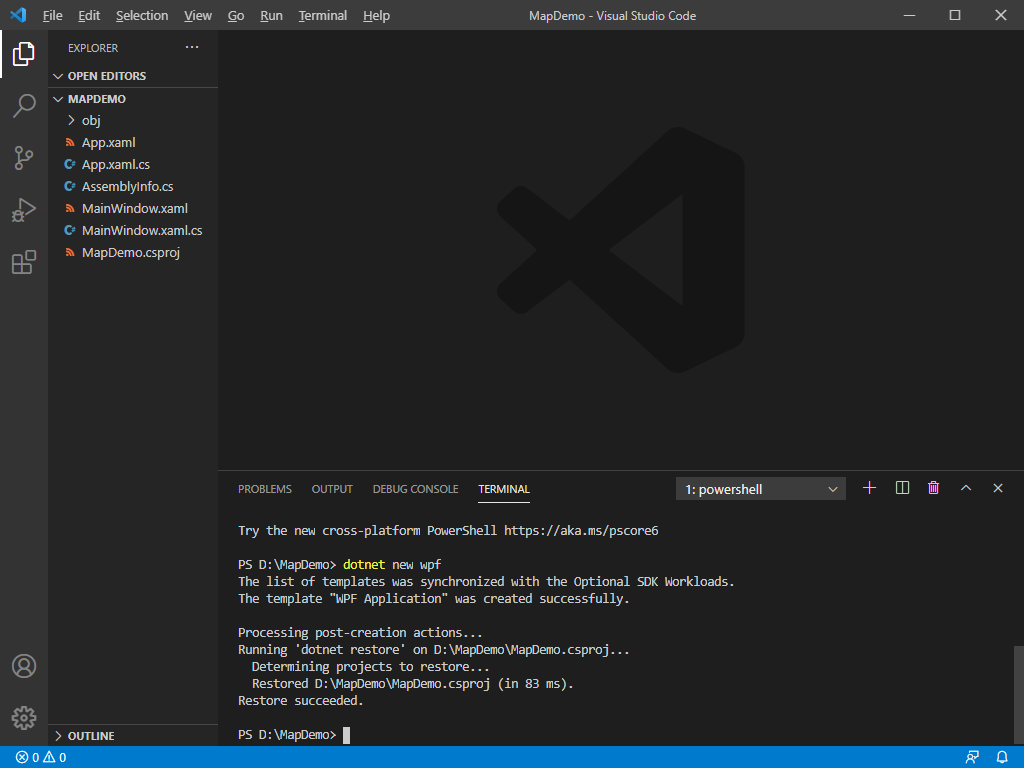
Let's create a new WPF project. Open VS Code, select File → Open Folder and choose a blank folder. If the TERMINAL window is not opened, select Terminal → New Terminal to open it. The folder I chose is D:\MapDemo which can also be seen in the terminal. The name of the folder "MAPDEMO" shows up in the explorer window on the left and of course, there's nothing in it.
Now let's create a WPF project by typing dotnet new wpf in the terminal and hit enter. The project will then be created, and the newly created files can be seen from the explorer window on the left.
Select View → Command Palette and select .NET: Generate Assets for Build and Debug, to generate assets for build and debug.
Hit F5 or select Run → Start Debugging, the following window might pop up for you to choose a running environment. Go ahead and select .NET Core.
If a blank window shows up, congratulations! The project is set up correctly.
Install NuGet packages
In order to display the online map, we will use ThinkGeo's WPF package that will provide us with a map control and a full suite of GIS tools to use.
Select View → Command Palette and select NuGet Package manager: Add Package.
The Nuget Package Search Box will pop up, type in "ThinkGeo.UI" and hit enter, go ahead and select ThinkGeo.UI.Wpf from the popping list.
Then select the latest non-beta version (12.3.10 in my case), click on it and the package is now added to the project.
Then you will be prompted to restore the unresolved dependencies, hit Restore and the Nuget packages will be downloaded, and we are ready to go.
Register for a Free Trial
While ThinkGeo is not open source, they do offer a free 30-day trial on each of their products. You'll need to register for a free ThinkGeo account here.
Activate Your Development Environment
Once registered, you will be redirected to your account homepage. From there, you will need to download ThinkGeo's ProductCenter application to activate your trial license. Select the latest version for your OS.
Open ProductCenter and login with your credentials used to create your account. Select the ThinkGeo UI WPF tile on the left and then click Start Evaluation to begin your 30-day trial.
Add the Map Control
To use ThinkGeo's map control, we'll need to add the ThinkGeo namespace in the Window control in MainWindow.xaml:
xmlns:tg="clr-namespace:ThinkGeo.UI.Wpf;assembly=ThinkGeo.UI.Wpf"
<Grid>
    <tg:MapView x:Name="map"/>
</Grid>
With the namespace added, I can now add the MapView control to the Grid:
The MapView control will need a name so that I can reference it in the code-behind. In this instance, I simply named it "mapView".
If you hit F5 to run the application, a window with a blank map will pop up.
Initialize the Map Loaded Event
The MapView is nearly setup. All I need to do is to add a background map Overlay during the initialization. So first I add Map_Loaded event to mapView in MainWindows.xaml.
<Grid>
    <tg:MapView x:Name="map" Loaded="Map_Loaded"/>
</Grid>
Then add the following using on the top in MainWindows.xaml.cs
using ThinkGeo.Core;
At last, add the following method in MainWindows.xaml.cs. It sets the unit the bounding box for the map, and adds a OpenStreetMap Overlay to the map.
    private void Map_Loaded(object sender, RoutedEventArgs e)
    {
        // Set the Map's Unit to Meter.
        map.MapUnit = GeographyUnit.Meter;
        // Set the Current Extent to the Max Extent of Open Street Map.
        map.CurrentExtent = MaxExtents.OsmMaps;

        // Create a new Open Street Map Overlay.
        var backgroundOverlay = new OpenStreetMapOverlay("HelloWorld");
        // Add the newly created overlay to map.
        map.Overlays.Add(backgroundOverlay);

        // Refresh the Map
        map.Refresh();
    }
Hit F5 to run the application and here we go, Open Street Map now is added to the map as the background. You can zoom in/out, pan, hold the Shift Key to track zoom in, or hold the Alt Key to rotate.
You can easily switch to another background overlay by just changing a couple lines of code. For example, by changing the Map_Loaded method to:
    private void Map_Loaded(object sender, RoutedEventArgs e)
    {
        // Set the Map's Unit to Meter.
        map.MapUnit = GeographyUnit.Meter;
        // Set the Current Extent to the Max Extent of ThinkGeo Map.
        map.CurrentExtent = MaxExtents.ThinkGeoMaps;

        // Create a new ThinkGeo Map Overlay. Here I'm using a demo Key, every registered user gets an eval key which is good for 30 days
        var backgroundOverlay = new ThinkGeoCloudVectorMapsOverlay("itZGOI8oafZwmtxP-XGiMvfWJPPc-dX35DmESmLlQIU~", "bcaCzPpmOG6le2pUz5EAaEKYI-KSMny_WxEAe7gMNQgGeN9sqL12OA~~", ThinkGeoCloudVectorMapsMapType.Light);

        // Add the newly created overlay to mapView.
        map.Overlays.Add(backgroundOverlay);

        // Refresh the Map
        map.Refresh();
    }
Review the Code
With that, our application is complete. Below is the code in full for your reference:
MainWindow.xaml:
<Window x:Class="MapDemo.MainWindow"
        xmlns="http://schemas.microsoft.com/winfx/2006/xaml/presentation"
        xmlns:x="http://schemas.microsoft.com/winfx/2006/xaml"
        xmlns:d="http://schemas.microsoft.com/expression/blend/2008"
        xmlns:mc="http://schemas.openxmlformats.org/markup-compatibility/2006"
        xmlns:local="clr-namespace:MapDemo"
        mc:Ignorable="d"
        xmlns:tg="clr-namespace:ThinkGeo.UI.Wpf;assembly=ThinkGeo.UI.Wpf"
        Title="MainWindow" Height="450" Width="800">

    <Grid>
        <tg:MapView x:Name="map" Loaded="Map_Loaded"/>
    </Grid>
</Window>
MainWindow.xaml.cs
	using System.Windows;
    using ThinkGeo.Core;
    using ThinkGeo.UI.Wpf;

    namespace MapDemo
    {
        public partial class MainWindow : Window
        {
            public MainWindow()
            {
                InitializeComponent();
            }

            private void Map_Loaded(object sender, RoutedEventArgs e)
            {
                map.MapUnit = GeographyUnit.Meter;
                map.CurrentExtent = MaxExtents.ThinkGeoMaps;

                var backgroundOverlay = new ThinkGeoCloudVectorMapsOverlay("itZGOI8oafZwmtxP-XGiMvfWJPPc-dX35DmESmLlQIU~", "bcaCzPpmOG6le2pUz5EAaEKYI-KSMny_WxEAe7gMNQgGeN9sqL12OA~~", ThinkGeoCloudVectorMapsMapType.Light);
                map.Overlays.Add(backgroundOverlay);

                // Refresh the Map
                map.Refresh();
            }
        }
    }
Closing Remarks
This sample only shows displaying a background from a map provider, but you can do a whole bunch more with the power of ThinkGeo.
This project is using .NET 5 and VS Code, but you can also use Visual Studio and/or .NET Core/.NET Framework to accomplish the same thing.
Let us know if there were any subjects that you would like to see covered in future blog articles!
Check out ThinkGeo's Desktop Maps product page for more of what features you'll get from our products!


